Pages

Saturday, September 14, 2019

Cookbook Flip Album

Thank you all for purchasing the Cookbook album Kit. I was excited to make mine but I never realized that I would love it so much. I am hoping you will love yours just too. Keep in mind that you can laminate any of these items to make them last longer. After you fill in your cards just run them through the laminator, seal them and you can get all kinds of things on them and just wipe it clean. Same with the outside just seal it and then it will last for a long, long time. 

We have also included the link to the PDF file for the cards in case you need more, just print them off. 

Written instructions are listed below as well as photos, and the link to your exclusive video tutorials

Trim out your recipe cards. You can see on the video how I trimmed mine but it is up to you how much or how little you trim off. 

Cut 2 pieces of the brown cardstock to 7x7 inches, these will be your covers for your 6x6 chipboard pieces included in your kits. Draw a line across the bottom and on the left side at the 1/2" mark from the edge, this will give you a good place to lay your chipboard in when glueing, to keep it straight.
Lay your chipboard down and cover with the cardstock. Trim the corners leaving at least 1/8" from the tip of the chipboard to the end of the paper. Fold your cardstock over the chipboard and glue in place. 

Inside mats are cut at 5 7/8x5 7/8 inches cut two and glue in place.

Outside mats are cut at 5 3/4"x5 3/4" cut two and glue in place. 

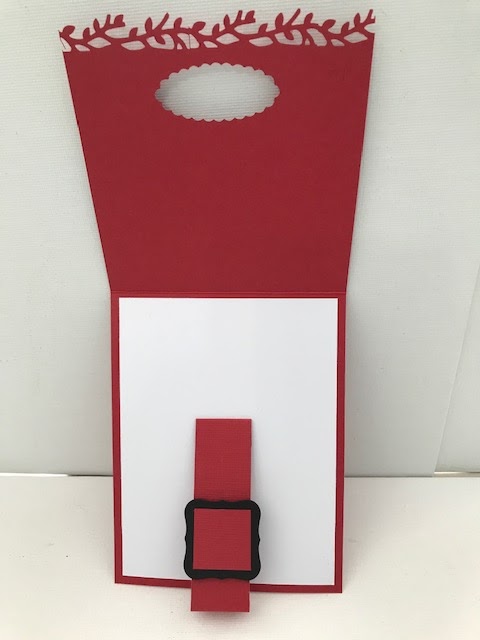
Cut strips from your brown cardstock that measures 1"x6 1/4" score on each end at 1/4". You will need 4 sheets for each page, two for front and two for back. Glue only on the two folded over scored ends and across one long edge. Leave the other edge open to slide your card into. You can make these various colors if you want to match each page. 

Cut a top strip that is 1 1/2"x5 3/4" score on the short side at 3/4" all the way down. Fold in half and use this piece on the edge where you will be putting your holes for the rings. This will act as a reinforcement. 

I punched my holes at the top, you can have a side flip if you want. For the top I only used two rings. I punched the holes 1 3/4" in from each side and 3/8" down from top. Using my crop-a-dial, on the largest hole I punched these out. I then colored my hole reinforcements brown and placed around the holes. Using these holes as a guide I then place my pages on them and marked my holes on my pages and punched the pages. 

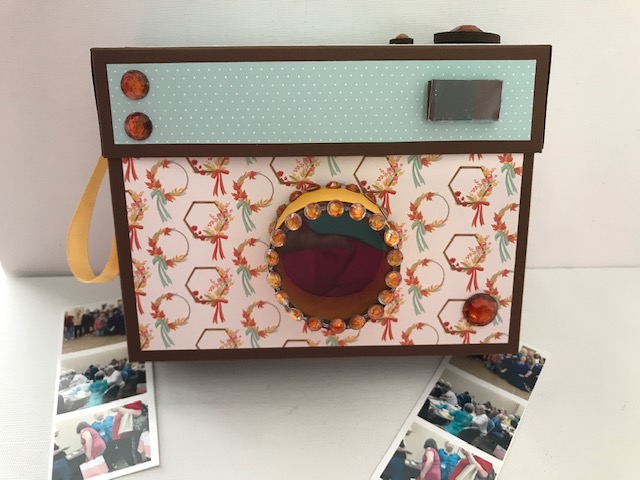
For the front it is up to you how you embellish, but I used just a piece of scrap red paper and cut a strip 1"x5 3/4" and ran across the middle. I then cut a brown piece that matched the browns on my pages 4 1/4x2 1/4 and a white piece that is 4x2. I glued the white piece on the brown and used this as my cover focal point. I used some old thickers I had in my stash to spell out Nana Cookbook, yes I forgot to put my ( 's) but I will add that in later. I also took some of my stickers and added them around, some bling, and the two charms on. 

I tied ribbon on the rings and it is finished for now. I will keep adding pages, and I will most likely seal this so I will not mess it up when I cook, since I get things everywhere when I am in the kitchen. lol. 

​I hope you have enjoyed this project. Let me know if you have and share it with us on our Facebook Group. We would love to see everyones take on the project. 

Please comment below if you have given this project a try. 

All products used are listed below the video in the description. 

If you would like to purchase one of the add ons please click HERE.


Products Used In this project: 

Mono Eraser

Scor tape
Art glitter glue 

Teflon Bone folder 


Monday, September 9, 2019

Buckle Christmas Card

Well we just had to do one more buckle card and this one is Christmas. I hope you enjoy, all the measurements are below as well as the video tutorial. You will find all the product used, that I can find, linked below the video.


Buckle Christmas Card

Cardstock base is 4 1/4x10" score on the 10" side at 4 1/5"
I then used an edge punch to punch the short side which will be the front of the card.
Cut a small opening in the front just large enough for your belt to go through.

White inside piece is 4x5 1/4 inches

Belt is cut at 1"x4 1/4" score at 1/2" on each end

I used a die to cut the belt buckle but you could just cut a square at 1 1/4"x1 1/4" and that would work.
The red piece to go on the center of the buckle is 1x1 inch.

Stamped sentiment area is cut at 3/4"x3 7/8" the mat for this piece is cut at 7/8x4 inches. 

Wednesday, September 4, 2019

Buckle Fold Card Series Card #2

This is our second card in our buckle fold series. This one is quick and easy and I love how it comes together. Hope you will make one and share on our Facebook Group.


Cardstock 8 1/2"x4 1/4" score at 3"
Cardstock for the buckle insert 5"x2 1/2" score at 1/2"

Inside Mat is 5"x4"
Buckle insert mat 2 1/4"x4 1/4"

Front mat is 4"x2 3/4"

Products used in this projects are listed below the video if I can find them. 


Tuesday, September 3, 2019

Buckle Card Series Card #1

As most of you know I love unusual cards. I like any card that is different and lots of fancy folds. So here is a series that I have been wanting to do for  a little while now. It is a Buckle card. So each day this week we will do a buckle card,, they will all be different, so no two will buckle the same way. Hope you enjoy and I hope this gives you some inspiration. If so please make sure to share on our Facebook Page. We would love to see your take on this card.


The card base is 9 3/4"x5 1/2" on the long side score at 4 1/4"

Mat for the inside is cut at 4 1/2"x4 1/2"

Mats for the outside are cut at 2 3/4"x5 1/4"
2 1/2"x5"

I used a die to cut the buckle part out but you can just cut a piece of paper that is 5/8"x2 1/2" if you want. 

All the links to the products I used are listed below the video.

Thanks so much and enjoy, E 


Thursday, August 29, 2019

Camera Box with Mini Album

Quick and easy gift idea is this camera box with a mini album inside. I have the tutorial up for the box and tomorrow we will make the little mini and put inside.


Box measurements:

Cardstock that is 11 1/8"x8 1/4" score on the long side at 4 3/4", 6 3/8" turn one turn and score at 1" and 7 1/4".

Design paper is cut at 5 7/8"x4 3/8" need 2 front and back
Design paper is cut at 4 3/8"x1 1/4" need 2 sides


Cut in on the center score lines just to the horizontal score line and wedge out, glue the little flap up and the sides together. Creating your box bottom. 

Box Lid:

Cardstock that is 9 3/8"x4 3/4" score on the long side at 1 1/2, 7 7/8" turn and score at 1 1/2"x 3 1/4"
Design paper for mats are cut as follows;
6"x1 3/8" for top
6"x1 1/8" cut 2
1 1/2x1 1/8 cut 2

For the little lens I used a paper towel roll and cut a piece that is 1". I then cut a circle that was 2 1/2" and 3 that were 1 3/4". Glue the 3 smaller ones together and place in the center of the large one. 
This piece will go on the bottom of the paper towel circle. You will need to cut slits in the edges so it will fold up and glue to the sides of the paper towel circle. This will create your base.
To create the top or lens part you will need another circle that is 2 1/5" and you need to cut out the center part at the 1 1/5" mark. So if you have another circle punch that is 1 1/5" then just use it and punch out the middle. Take a piece of acetate that is a little larger than the opening and glue on the inside. Cut you slits in this piece as well and glue it on the other end of the paper towel circle creating your lens. If you want to put something inside this little lens you could and it would be beautiful.  

For the circles on the top I used a 1" circle punch and just punched out quite a few and glued them together making a stack. Do the same with the small circles, those are 3/8" circles. This will make your buttons for the top. 

For the little part on the top front I used a piece of paper that was 1/2"x12" and scored every 1" forming an accordion. Cut a piece of acetate and put on the front making it look like the little view finder. Glue the folds together and place on the front. Glue you bling where ever you like. Put your little ribbon handle on the end and it is finished. 


Mini Album

Cardstock cut at 12x4 1/2" score at 5 1/2" turn 180 and score at 5 1/2". 
Page two cardstock 11 3/4"x4 1/2" score at 5 1/2" on each end as above.
Page three cardstock 11 1/2"x4 1/2" score at 5 1/2 on each end as above.
Final page cardstock 11 1/4"x 4 1/2" score at 5 1/2 on each end as above.

Mats for your pages are 4 1/4x5 1/4 you will need 16 of these.

Glue the pages together at the spine in the order shown above and on the video, embellish and you are finished. 


Monday, August 19, 2019

New Style Mini Album With Flips, Flaps and Pockets

A full tutorial is uploading on our YouTube channel now. It is a little long than usual but well worth the watch. This mini is adorable and easy and quick to put together. All product used is listed under the video in the show more section. I love this paper!!


Here are the measurements: 

Chipboard pieces 2 1/2x6
Cover pieces 6x6 inches cut 2

It is best to watch the video after you get your pieces cut or as you are cutting your pieces. This is just easier than me trying to explain how to lay your pieces down. I go into lots of detail on the video. 

Paper for outside cover is:

6x8 cut 1 
5 1/2x8 cut 2

Inside cover pieces:

5 1/2x6 cut 1
4 1/8x5 1/2 inches cut 2

Pages

12x5 3/4 inch score on the long side at 5" and then turn 180 degrees and score at 5"
11 1/2x5 3/4 inch score on long side at 5" and turn 180 score at 5"
11x5 3/4 inch on long side score at 5" turn 180 and score at 5"
10 1/2x5 3/4 on long side score at 5" turn 180 score at 5"

These are your pages and spine. Stack these pages starting with the longest and moving to the smallest and glue together. This is show in detail in the video. 

Mats

Page mats are 4 3/4"x5 1/2" 

Pocket mat is 3 1/4"x4 3/4"

Pockets and Flaps 

Small Pocket is cut at 3 1/2x5 1/2 on long side score at 1/2" on both ends.
Large pocket 5 3/4x6 inches on long side score at 1/2" on both ends
Flaps 5"x6 1/4 score on the 6 1/4" side at 1/2"

Glue these on any page you like. 

You can make pocket inserts or tags like I did to go inside your pockets. 

Cut out the pull tab on the pockets and the flaps, so when flipping through you know where your pockets and tab pages are. 


Thursday, August 15, 2019

Long Card & DIY Matching Envelope

We had lots of messages after we made the templates for the regular size envelopes. Most everyone wanted to know how to make the envelopes for the long cards. So we have done those calculations and here you go. Hope this helps everyone. You know after making this envelope and long card I am loving long cards. I think I may be making more of them soon. 


This card is 4 1/2"x8" when it is finished. 

You will start off with a piece of cardstock that is 8"x8" and I wanted mine off set at the bottom so I scored mine at 3 1/2" this gave me a little big longer back than front. I added a piece of white paper on the inside for the writing that is 3 1/2x7 1/2" and the piece at the top is 3 1/2x8" I used my punch and made a decorative edge on this that I left showing just a little on the outside.  

The flowers on the front are just from some various dies I have that will be linked below the video if I can find them.

Now we are ready for the envelope.

The way you calculate the size of the paper you will need for the envelope is as follows.

Take the length of your card, (8") and add 1 1/2" so your paper would be 9 1/2" wide. Then to get the high of your paper take the finished high of the card times 2 and then add 2" for the flap. 
Example (my card is 4 1/2"x2 = 9" + 2" = 11" so the height of your paper would be 11".

Overall paper size is 9 1/2"x11"

Then on the 9 1/2" side you will need to score at 1/2" on both sides. So whatever size your paper is score at 1/2" turn to the other side and score at 1/2". 

Turn your paper to the 11" side and score the height of your card, in my case mine is 4 1/2", then you will add the height of your card again plus 1/2" to give the back a little extra height than the front. So in my case I then scored at 9 1/2". This leaves me with 1 1/2" flap. If you want your flap to be larger then just add more inches onto the paper size. 

I hope this makes sense if not try to watch the video and read this along with it. I promise it will make more sense then lol. 

Thanks so much. E


Tuesday, August 13, 2019

Pop Up Car Card

The stamp set that came with our August E Club Kit is wonderful. It is right down my alley, travel, that is what I love to do. We did a pop up card using the little car and so other stamps in the set. Hope you enjoy and give it a try. We do still have 4 Aug kits available that include these stamps if you want one just click the link HERE.


The size is 4 1/4x5 1/2
Top mat is 4"x 5 1/4"
Small mats are 2 3/4x3 1/2
2 1/2x3 1/4

Inside pop up: cardstock 2 3/4x6 1/2 score on long side at 1 1/2, 3, 4 1/2, 6 fold over glue flap and create the box to glue on the inside. This will hold your car and the road. 

Banners are cut at 3/4x2 then just cut to side depending on what you want. 

Inside mats are 4x3 3/4


Monday, August 12, 2019

Mini Album and More Storage

We are making a storage for mini albums, journals, notebooks, glasses, pens and more. This is a very functional storage container you can sit beside your bed or on an end table to hold all those items that tend to collect there. The over all size is 6"x9 1/2"x6" so it is perfect for the tables.  Below is the full tutorial as well as the measurements and photos. Hope to see you guys make a few of these they can be used for so many different things. 


Share in our Facebook Group


Measurements

Chipboard sizes
Bottom: 6x9 1/2
Sides 6x9 1/2 cut 2 of these
Back 6x6
Divider 3 1/2x6

Construction strips 1"x12" score in the center at 1/2" and place score tape on both sides of the score line. Use this to attach the chipboard together.
After joining your chipboard pieces together go ahead and cover the outside edges of the chipboard. This will give you a base mat and make the piece more sturdy. 


Inside Mats

Inside mats are cut 1/16 shy of the chipboard. 

Outside Mats

Front mat 5 3/4"x2 3/4"
Side mats cut 9 1/4"x5 3/4" cut 2 and then lay against your chipboard and trim to match the angle. Cut 2 of these.
Back mat is cut at 5 3/4"x5 3/4"
Bottom Mat is cut at 9 1/4"x5 3/4"


Divider

Make sure to put your constructions strips on two short sides and one long side and then turn it over and do the same. This way when you place it in the container it will not slip. I show in the video how to place it in. Mat for the divider 5 3/4"x7 1/8" this piece will fold over the top of the divider and onto the back forming the full mat.You will place it at the 2 1/2" mark from the front. Put a construction strip on the top to cap the top off and cover the chipboard. Glue it down

Products Used

All products used in this project are listed below the video.