Pages

Monday, July 8, 2019

Mini Double Cascading Photo Folio

What is better than a little album you can hand deliver that holds lots of photos. And to make it even better it is quick and easy and doesn't use a ton of paper. We created this little mini using items from our July E Club kit. I am very excited as to how it turned out. All the measurements and tutorial will be below.


Cardstock 3"x12" on the long side score at 3 1/2"x4", 8", 8 1/2" round the ends.
For the inside parts your cardstock should be 9x2 3/4" score on the long side at 1/2", 3 3/8" 6 1/4" you will need two of these for the double cascade.
For the little flaps on each end you will need a piece of cardstock that is 5 1/4x3 1/4" score on the long side at 2 3/4" do this to both pieces.

The oval attachment is 3 1/2" long x 2 1/2" wide. I can not find the exact over I used to die cut mine but I have linked one that will work here.

Mats are cut as follows:

2 center and back 3 3/4"x2 3/4"
2 sides 3 1/4"x2 3/4"
2 fronts 3 1/4"x2 3/4"

Cascading mats 2 5/8"x2 1/2 you will need 12

Sides flap mats 4 at 3"x2 1/4"
back piece 2 1/2"x3" cut 2 of these

All the items I used that I can find are linked under the video, in the description.


Tuesday, July 2, 2019

Exploding Boxed Mini Album

Hey everyone,

Lets think outside the "box" and make a cascading mini album with a box attached. Think it might be hard? Well believe me it is the easiest one you will ever make. Below is the full tutorial as well as full photos and measurements.


Cardstock 12x11 1/4" score on the long side at 2 3/4", 5 1/2", 8 1/4" and 11" turn to the left with the 11" score line at the top of the score board and score at 2 3/4" and 8 1/2" go back and score just down to the second score line at 1 3/4" and 9 1/2"

Fold and burnish all except the partial score lines.

Cut away the bottom two corner squares leave the 2nd ones and cut away the middle ones as show in the photo below.


Cut away from the partial score line down to the second score line as shown in the photo above and then cut up and notch the little squares. 

Mats for the outside and inside are 5 5/8x2 5/8 inches you will need 8
Mats front small flap 7/8x5 5/8 cut 1
Mats for small side tabs 7/8x2 5/8 cut 2
Mats for large tabs 2 5/8x2 5/8 cut 2

Cascading part

Cut solid cardstock at 2 5/8x2 7/8 on the long side score at 1/4" on all. Cut 22, 11 for each side.
White cardstock 2 1/2x2 1/2 cut 22, use a decorative punch for the corners or just round them.

Inside pockets and tags

Pocket 5 5/8x1 1/2 notch the top for a finger pull and then glue on three sides.
Tag for this is cut at 2 1/4x4 3/4 inches

Small pocket on bottom is 2 1/2x2 notched at top and glued on three sides
Tag is cut at 2 1/4x 4 1/2


Enjoy, E 


Thursday, June 27, 2019

Birdhouse Box Card

I love birdhouses what about you? And I love box cards do you? Well lets combine the two in this beautiful card. This was inspired by a challenge we posted on our E Club Kit group a few weeks ago. The challenge was show me photos of some things you would like to see me recreate and your name will be entered into a drawing for a FREE months E Kit. We have had quite a few entries and I think this is Kathy Champion's entry. So here is our take on this card. 


Measurements:

Cardstock cut at 11 1/2x6 1/2 inches, on the long side score at 2 3/4", 5 1/2", 8 1/4" 11" turn to the left and score at 3".

Fold and burnish score lines, with the 3" panels facing you, cut up on all the score lines and cut away the small tab at the end.

Mats for the bottom of the box is 2 1/2"x3 3/8" cut 4 of these
top flap mats 2 1/2"x2 3/4" cut three of these. 

Back piece for the birdhouse roof is cut at 5 1/2"x2 3/4" cut 3 if your cardstock is thin, two if not thin.
Mat for this is 2 1/2x5 1/8"

Roof pieces is cut at 1"3 1/8" cut 2

Top scallop circle is 1" Punch
white circle is 3/4" circle punch

Birdhouse opening piece is 1 1/4" punch

Inside strips are cut at 1/2x4 scored at 1/2 on each end - these may need adjusting some to fit yours.

I used the Garden Bird die to create the flowes and some branches. 


Wednesday, June 26, 2019

Announcing Our Online "M.E." Classes

We are so excited to announce the first of our Online "M.E." Classes. We have had so many messages, comments and emails asking about them over the years that we can't put it off any longer. There are many reasons why an online class can work for you but the most important is we have friends who are not able to get out and travel long distances to take our classes in person and we want to be able to bring them the same quality classes we teach when we go to Made It Con, or Stamp shows, etc. These classes will be exclusive and will not be made public on our YouTube channel or any other social media platform. 

Classes will be pre-recorded and when purchased you will receive a link through your email. All you have to do is click the link and follow along. You can stop the video anytime and replay as many times as you want. We will also have an email address provided where you are welcome to send emails with any questions you may have, and we will get them answered ASAP. 

The projects will vary from month to month and you will be able to select which ones you want to purchase. There is not commitment to purchase all classes. 

Former classes will stay up forever, therefore if you skipped one and then later want to go back and purchase you may. 

Every class we post you will be able to make with products you have at home, or if you need to purchase anything extra we will have those items available in the store. We will also have kits for each class available, but they will be limited. When they are gone they are gone. So if you go back months and purchase a class there may or may not be a kit available for that class. But as I said you should be able to make these projects with items you have or items you can purchases locally or on our store link. All purchases from our store will be at a 15% discount for anyone who has purchased the class. The class kits are not included in the discount due to the fact we are already discounting them as we combine the products. 

When purchasing a class you are agreeing to our copyright agreement which states that, all Videos, Classes, Files, PDF's, and Templates are copyrighted for SWME therefore, they can not be shared. They are yours as you purchased but please do not share them with anyone.

All classes will also come with full view photos and written instructions of each process to help you with assembly. And there will be a finished project photo on the purchase page so you will know what you are purchasing. 

Class sales will begin August 1st, 2019. We will post a link on our social media sites as well as our Website, along with the finished project photo. Class kits will go on sale the same day, but keep in mind they will be limited. 

The first of our Online Classes will be called Suitcase Mini Album. 

Are you excited? Let me know in the comments below this post and someone could win a FREE August class! We will pick one winner on July 26 and they will be notified by email, so make sure to leave your email address in your comments. 


Thank you so much for your support,

Melina and Edith


Thursday, June 20, 2019

July E Club Kit Sneak Peek

Here you go with a sneak peek of our July E Club Kits. This is not everything we like to leave some things as a surprise when you get your kits. There is also a prototype photo of the Maymay stamp set that we didn't have when we did this video. I love it. 

This kit is packed full, and as we say in the video we listed to you and we have included a full pack 30 sheets of a 6x6 paper pad from Prima, Golden Coast. Let me know what you think about it. And don't forget to sign up, don't miss this one, they are going fast. 

You also get free PDF files and YouTube tutorials of all the projects I make using the items in the kit. And that is not all our design team also makes great videos for you on projects they do as well, so you never run out of great things to create. 

Remember there are always a few surprises we leave out of the photos and videos just so you have a surprise in your kit. 


Tuesday, June 18, 2019

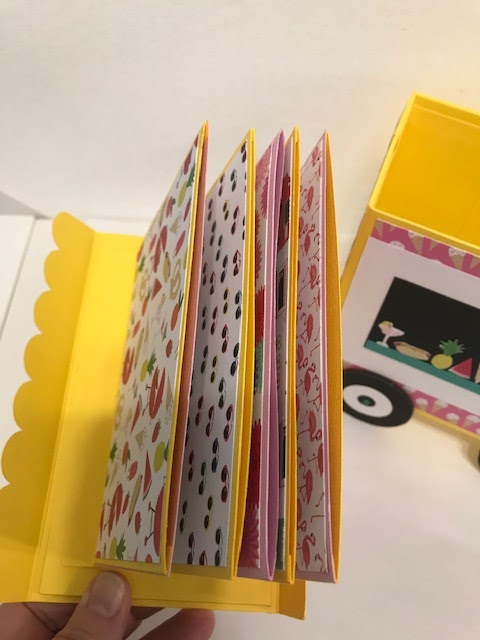
Mini Album In Ice Cream Cart

We finished our mini in the ice cream cart inspired by the Maymay stamp set for our June E Club Kits. Sign Up for our E Club Kits HERE. This cart has a lid that lifts off and has a hanging mini attached. You can put all those photos of the young ones having all that summer fun in here and it will make a beautiful display. Below is the full tutorial as well as links to the templates, and measurements. 


Ice Cream Cart

Chipboard is cut at 4 1/2x6 for the front and back.
The sides are cut at 4 1/2x3 1/2 cut two of these.
Top cut one piece that is 3 1/2x6 1/4"

Attaching paper for the chipboard is cut at 6x12 and 6x9 1/4 glue these together on the long end to make a piece that is 21 1/4"x6 this is the cover for the chipboard. Lay the chipboard out as shown in the photo below and glue it to the paper. 


After you have cut the corners and glue the edges up around the chipboard cut your inside cover. LEAVE ONE END UNATTACHED, YOU WILL USE THIS TO CONNECT THE ENDS TOGETHER.

Cover for the inside is 12x4 and a piece of 7x4 glue these two together creating a long piece that is
 19 1/2x4 

Top mat is cut at 6 1/2x4 3/4" score on the short side at 3 3/4" 

Scallop edge template is HERE, score it at 1" and glue it on the opposite end of the 3 3/4" score line you just made, this will be the top pieces. 

Chipboard for the top inside is 3 1/2x6 1/4 and cover on one side by the cardstock and then glued on the inside of the top between score line and edge.

Wheels are cut at 1 3/4" circles and I used about 7 to glue together to make them strong enough to hold this up.

White caps inside wheels is cut at 1" circle 

Black piece in the center of white is a 1/2" circle, then I added one piece of bling to the center of this piece.

White piece for the front of the mini is cut at 5 3/4"x3 1/4", glue the black piece in the center of this it is cut at 2"x4 1/2" then the teal piece for the ledge is cut at 1/4"x4 1/2".

Mini album page attachment is cut at 5 1/2x8" on the 8" side score at every 1/2" accordion fold as shown in the video and then make mountains and valley folds to create the attachment for the pages.

Pages are cut at 6"x3 3/4" and scored on the long side at 1/4" on each end. Put glue on this 1/4" flap and glue the other piece to this. This piece is cut at 5 1/2"x3 3/4". You will need enough for 5 pages.


Wednesday, June 12, 2019

Grill Master Apron Box With Cascading Mini Album

This is a beautiful and easy Apron Box with a cascading mini album. It is so easy and quick you are going to want to do lots of them for Father's Day and other occasions as well. Below you will find the template as well as the measurements and the full video tutorial.


Apron Box

Start off with a piece of cardstock that is 9"x7" on the long side score at 2 1/2", 6 1/2" turn and score at 2 1/2"x 4 1/2"

with the long sides going to the right and left cut up on the score lines and just cut away the score line. 

Apron front and back, cut cardstock at 4 1/4"x6" cut 2 pieces. Using the template linked below trace and cut away just the armhole pieces. When you are printing your template make sure to  print at 100% or normal size whichever your printer does.


White mats are 4 1/2x6 inches and I just lay them on there and trace around them leaving about 1/8" on all sides except the top and bottom.

Pocket is cut at 3 1/2"x2 1/2" and the mat is 3 5/8"x2 5/8"
Little strip at the top of pocket is cut at 1/4"x3 1/2"

Files for the Cricut spoon, knife, fork and spatula are below the video.

Straps at the top are cut at 1/4"x6" and glued to each side at the corners of the solid cardstock then put a brad, eyelet or bling at the top to looks as if this is what is holding it on.

I used the cricut to write Grill Master on mine but you could use a stamp.

Brag book

Cut 3 sheets of cardstock that are 12"x3" on the long side score at 4 and 8 inches
Attach these together using the last piece on two of them creating a long accordion fold

Cover for the mini is cut at 9x3 1/4" on the long side score at 4 1/4" and 4 3/4"
Mats for the cover are cut at 2 5/8"x3 1/2" cut 2
White piece is cut at 2"x2 3/4"
Purple piece is cut at 2 7/8"x2 1/8"

Page mats are cut at 2 3/4"x3 3/4" you will need  14 of these.